
Whenever I need a stretchy bind-off I always turn to Jeny’s Surprisingly Stretchy Bind-Off. It looks great and keeps its shape well, making it the perfect finish for lace shawls, sock cuffs or the hem of a top-down jumper. What makes this binding so stretchy is that you work a yarn over (yo) before every stitch, giving the bind-off that little bit of extra yarn and increasing its ability to stretch.
How you ‘prepare’ each stitch will depend on whether it is to be worked as a knit or a purl stitch.
If it will be a knit stitch, you will need to bring the yarn over the right needle then under again to the back of the work (the opposite to a standard yo). You then knit the next stitch as normal.
If it will be a purl stitch, you will need to bring the yarn under the right needle then over again to the front of the work. You then purl the next stitch as normal.
If you are binding off a ribbed cuff or a hem, you will probably want to continue to bind off in rib for a neat finish. Changing between the knit and purl stitches will require a different method for ‘preparing’ your stitch. Here I am binding off in 1×1 rib, but the method for switching between a knit and a purl stitch applies no matter which style of ribbing you are using.
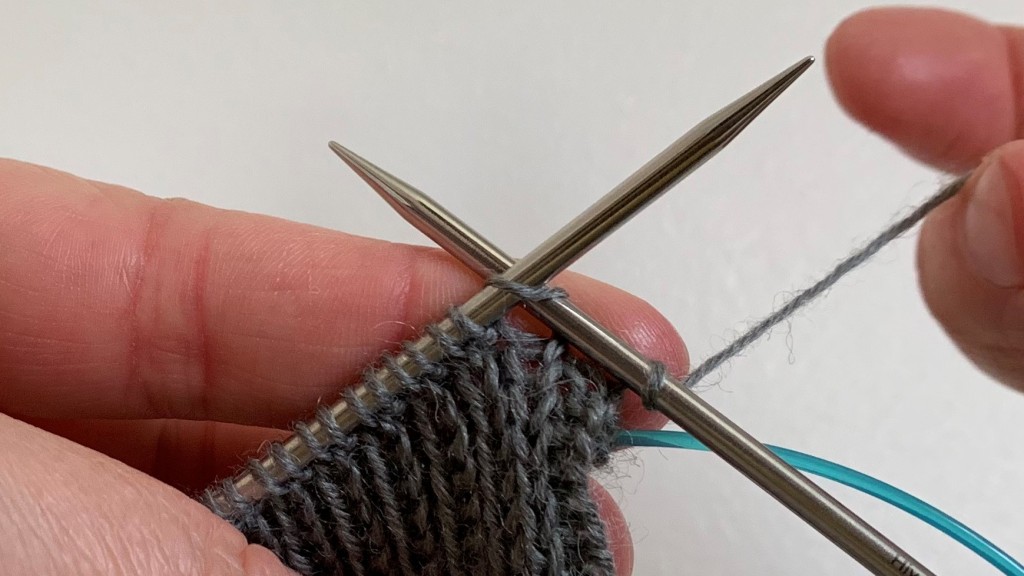
1. My first stitch will be a knit stitch, so I have carried the yarn over the the top of the right neeedle then under again to the back of the work before knitting the first stitch.

2. You will now have 2 stitches on the needles. Lift the yo over the knit stitch and off the needle, just as you would for a standard bind-off.

3. As my next stitch is to be a purl stitch, I am going to leave the yarn at the back of the work while continuing to purl the next stitch.

4. The act of purling the stitch with the yarn at the back of the work will create the yarn over needed to ‘prepare’ the purl stitch.
N.B. Depending on the yarn you are using you may need to pull the work down a little to help the stitches sit evenly on the needle.

5. Now I need to bind-off the yo and the first knit stitch. I prefer to do this both together for speed but you can do this one at a time if you find this easier.

6. As my next stitch will be a knit stitch, I will leave the yarn at the front of the work and continue to knit the next stitch.
I will then bind of the yo and the previous purl stitch as before.
This method of binding off the yo and the previous stitch together is the same for all stitches, whether you are binding off in stocking stitch or rib.